The sections below will cover the following:
Filesystems are typically structured like a tree, where all files will stem from root "/". The Cisco IOS manages multiple file systems that are identifed using a naming convention that is derived from either the device type or network service, followed by a colon. (Cisco, 2014).
Managed Filesystems

flash:/c1841-advipservicesk9-mz.124-10.bin

nvram:/startup-config    system:/running-config
In this section we will be discussing files on following devices in order to get a basic understanding of how our Cisco device works.
- flash:
- nvram:
- system:
|
1
|
Execute the following commands to view the available filesystems |
Router#show file systems
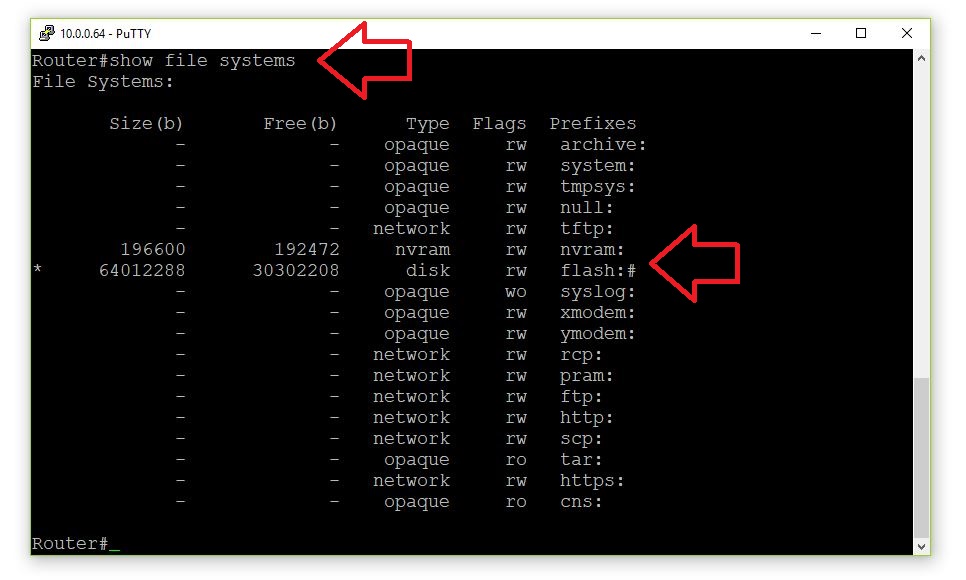
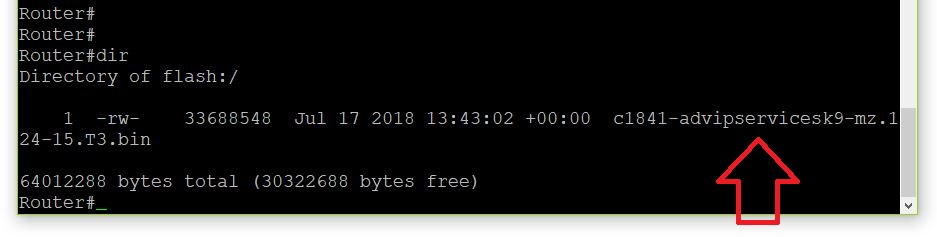
By default you are managing the root directory of the FAT filesystem on Flash:. This is also the default location that your Cisco device will look to load the Cisco IOS from. When executing the dir command, it will list the files in the current working directory and display it's location.
|
2
|
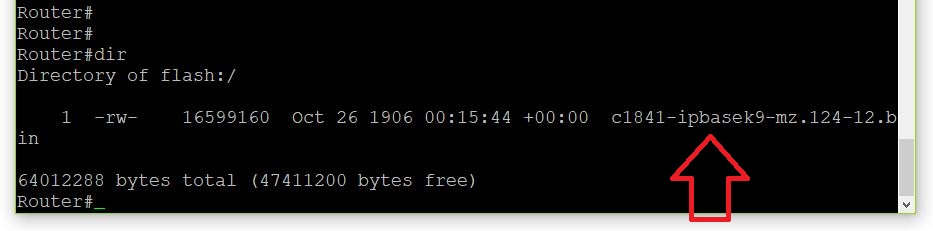
Execute the following command to view the IOS image file |
Router#dir
|
3
|
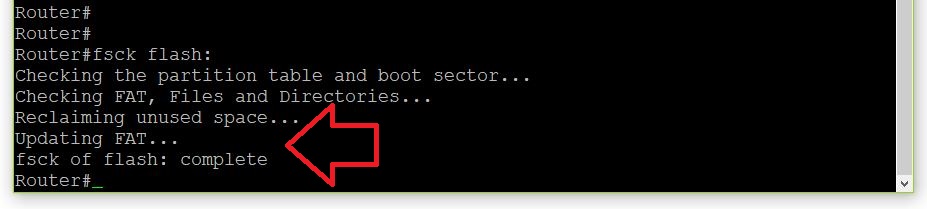
Execute the following command to verify the FAT filesystem is in use on that device |
Router#fsck flash:
Once the operating system loads, your Cisco device will look to load any persistent configuration from nvram:/startup-config by default. If none exists within this container, then the device will load the default configuration.
|
4
|
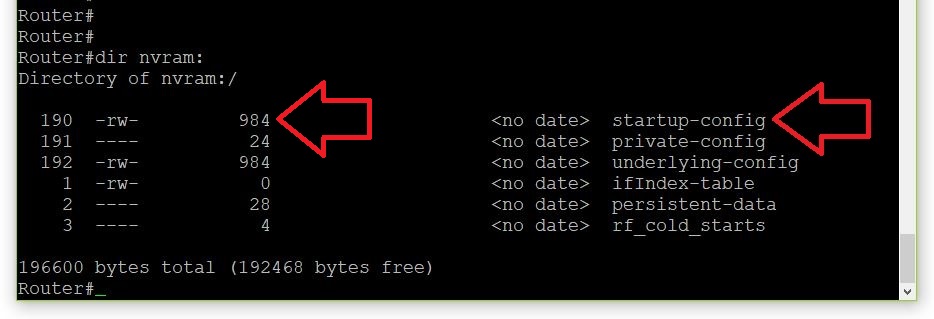
Execute the following command to view the startup-config container and any bytes of persistent configuration contained therein |
Router#dir nvram:
Once the type of configuration is determined (persistent or default), the next step is to load it into system:/running-config.
|
5
|
Execute the following command to view the running-config container and the number of bytes therein |
Router#dir system:
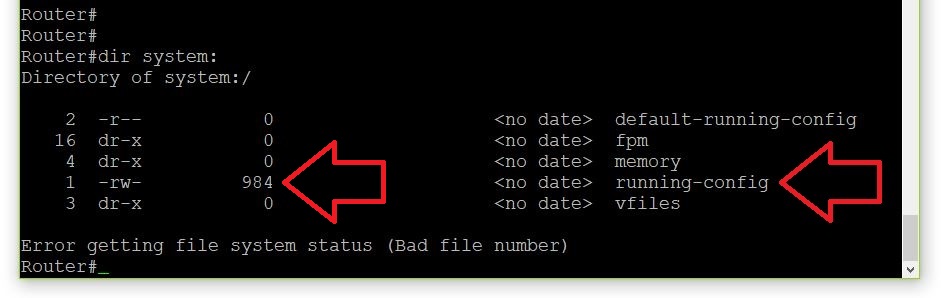
Both the running-config and startup-config are considered files. However, you cannot delete them, only the bytes within them.
|
6
|
Execute the following command and press the Enter key twice to delete the persistent bytes |
Router#delete nvram:startup-config

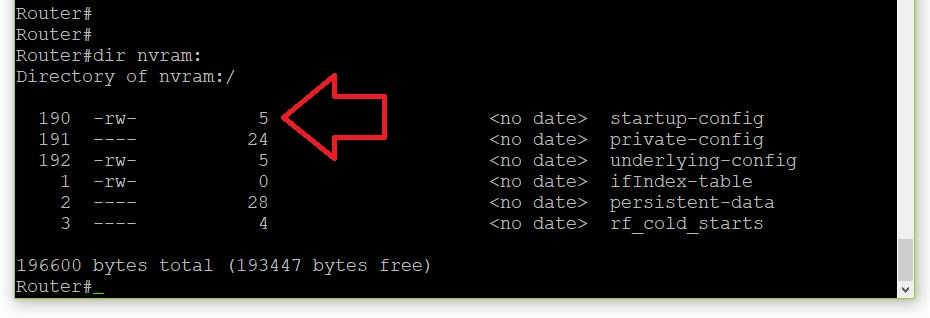
Anytime you see a zero or a five for the number of bytes, this means there is no persistent configuration.
|
7
|
Execute the following command to verify |
Router#dir nvram:
|
8
|
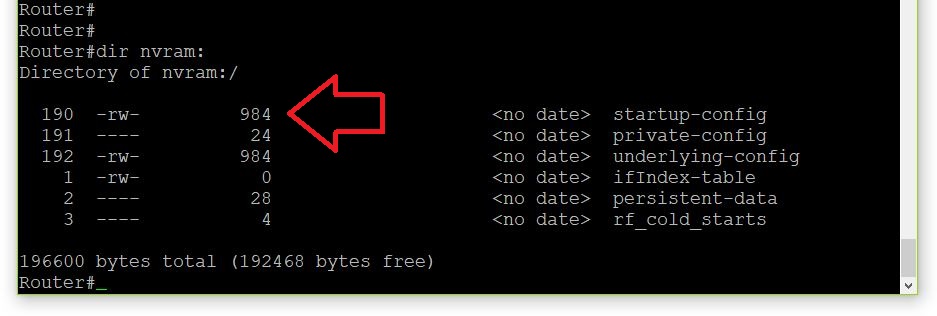
Execute the following command to save the running configuration to persistent memory |
Router#copy running-config startup-config

|
9
|
Execute the following command to verify |
Router#dir nvram:
The shortest form of this command is cop ru st. However, an easier way to memorize a short form is displayed below.
|
10
|
Execute the following command to do the same thing using a shorter form of the command |
Router#copy run start

This way of saving is useful in understanding how the process works. But, executing the write command can do the same thing.
|
11
|
Execute the following command to issue a save an even easier way |
Router#write

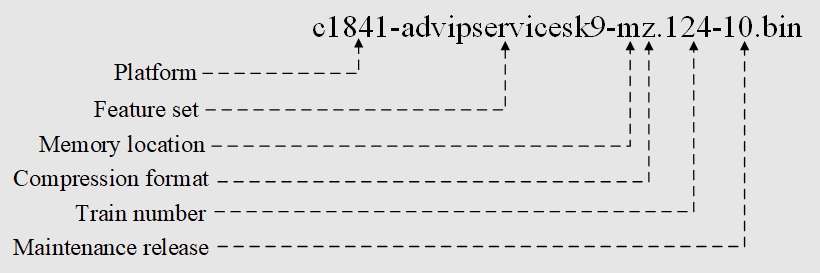
Your Cisco device contains a bunch of hardware and software that is capable of many features. However, the majority of these features are disabled by default. The way that you can enable them is through commands afforded by the Cisco IOS image file. However, not all image files are the same. Your Cisco IOS software is going to group commands based on the features that they can enable (Cisco, 2005).
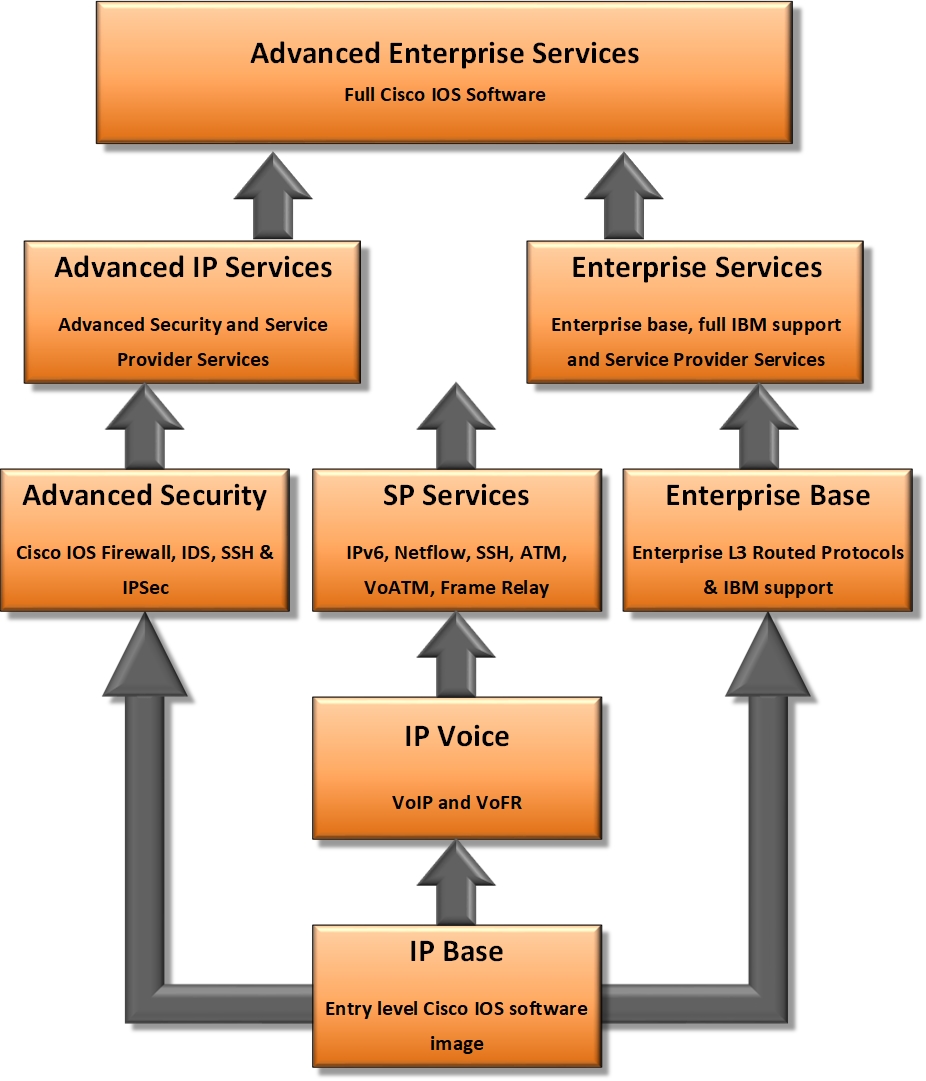
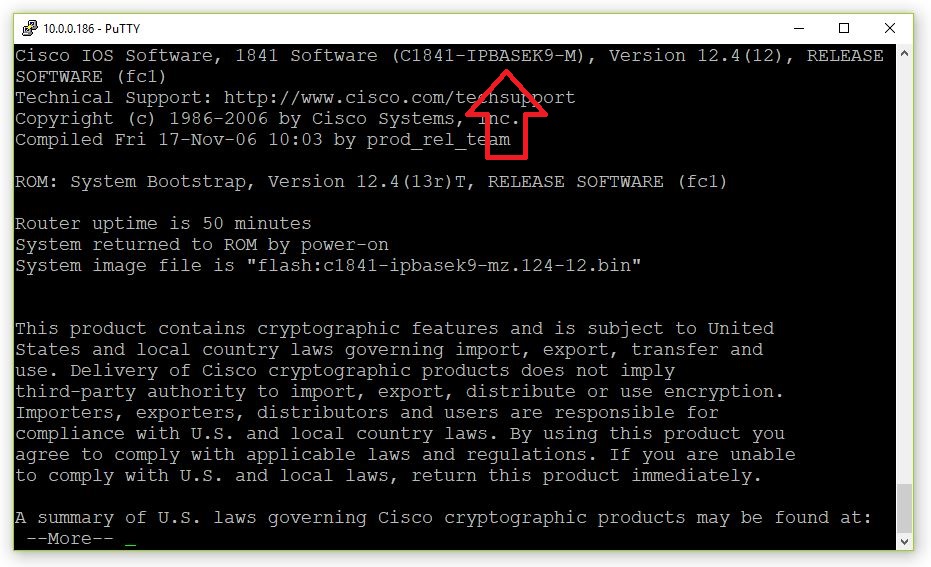
The Cisco IOS is typically a compressed file that gets decompressed and loaded into RAM during boot-up. Two things when looking at the image descriptions below that may not be apparent to you; Think of the platform as a specific version of hardware and think of the train number as a specific version of software. The commands that are available to you are dependent on the IOS version and feature set.
The default storage location of this file is off root in flash:, which is also the default filesystem and working directory managed by a privilege level 15 user.
|
1
|
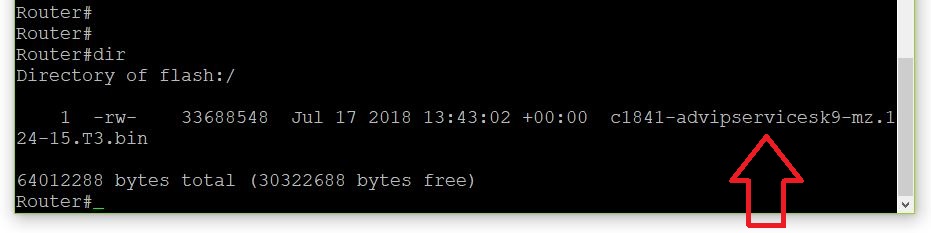
Execute the following command to view the working directory, and the IOS image file within it |
Router#dir
|
2
|
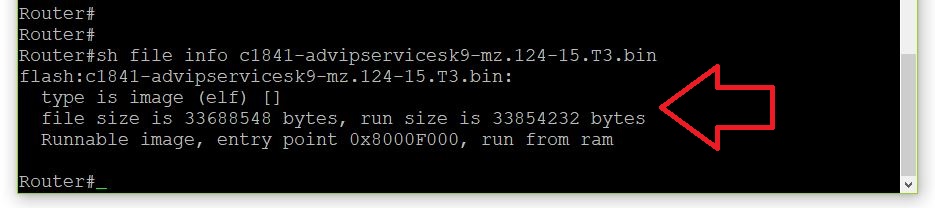
Execute the following command to verify that the IOS is an executable image file |
Router#show file information c1841-advipservicesk9-mz.124-15.T3.bin
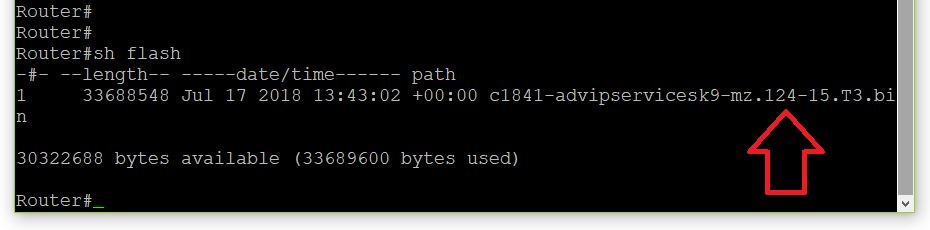
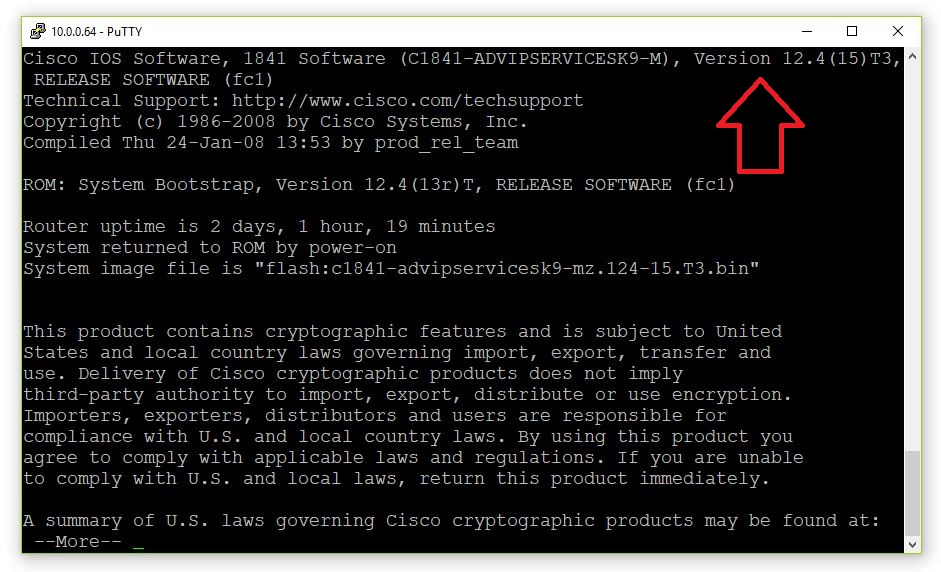
Commands are made available or retired based on a particular software release. The following commands can be used to verify the IOS version:
- show flash:
- show version
- show running-config
|
3
|
Execute the following command to view the IOS version from the image file |
Router#show flash:
|
4
|
Execute the following command to view the IOS version in the showput |
Router#show version
|
5
|
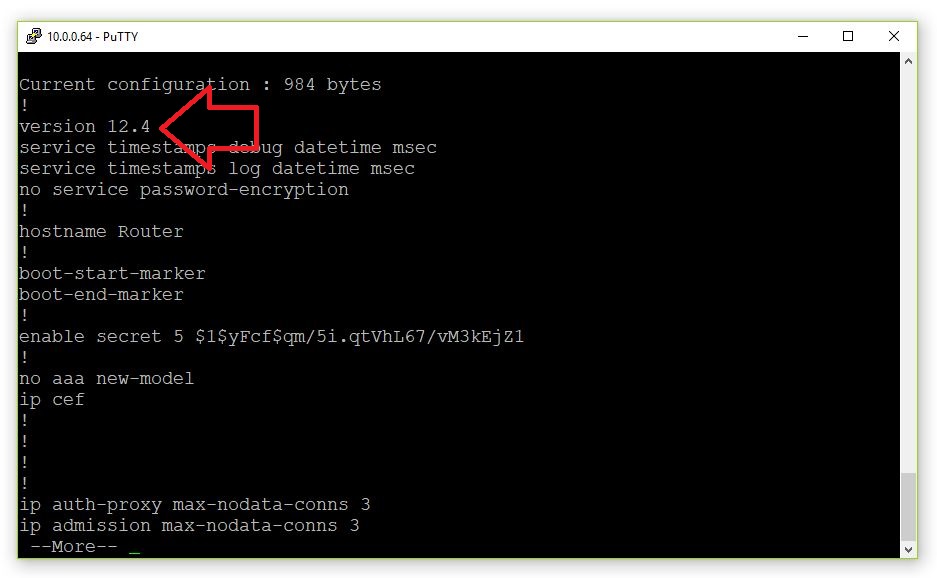
Execute the following command to view the IOS version inside the configuration file |
Router#show running-config
A common practice is to search the documentation to see which IOS versions are supported by particular commands. Once this information is gleaned, the documentation will instruct the reader to use Cisco's Feature Navigator to see which images can be used (Click here to see this).
The sub-sections will walk you through the following:
-
Managing IOS image files
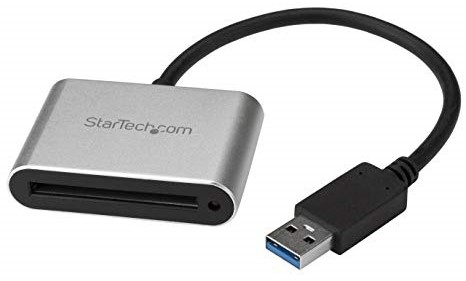
- USB Flash dongle
- USB
- Managing config files
USB Flash dongle
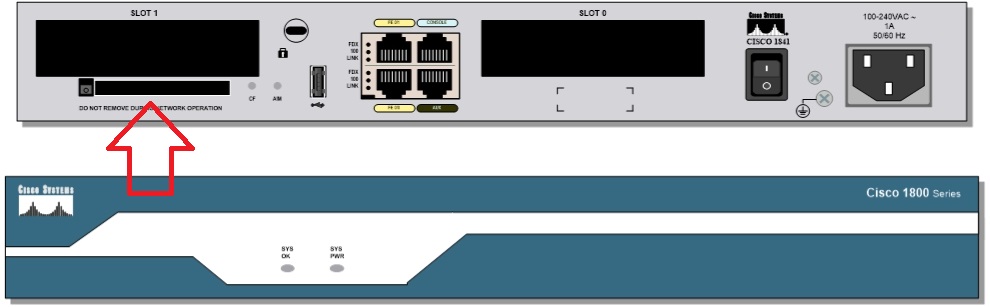
The Cisco IOS is loaded from flash:/ by default. Below will walk you through two ways to transfer the image file. Both of these methods require physical access to the equipment. However, this first method requires no command line knowledge and can be accompished following these steps:
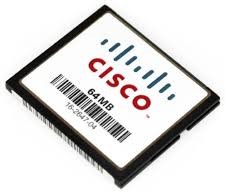
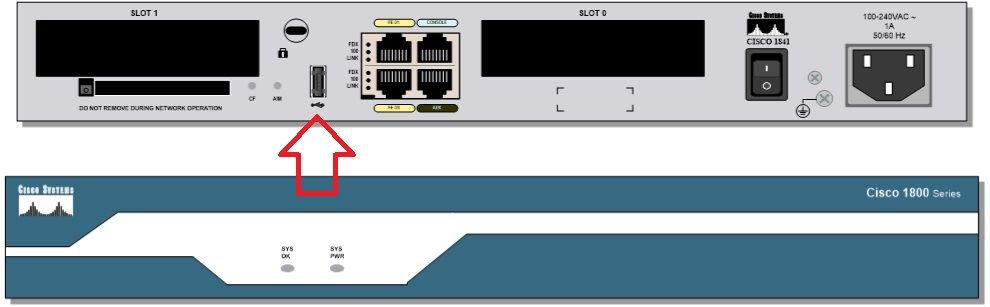
- Simply pop the flash card out of the 1841
- Insert the card into the card reader
- Insert the USB dongle into your workstation
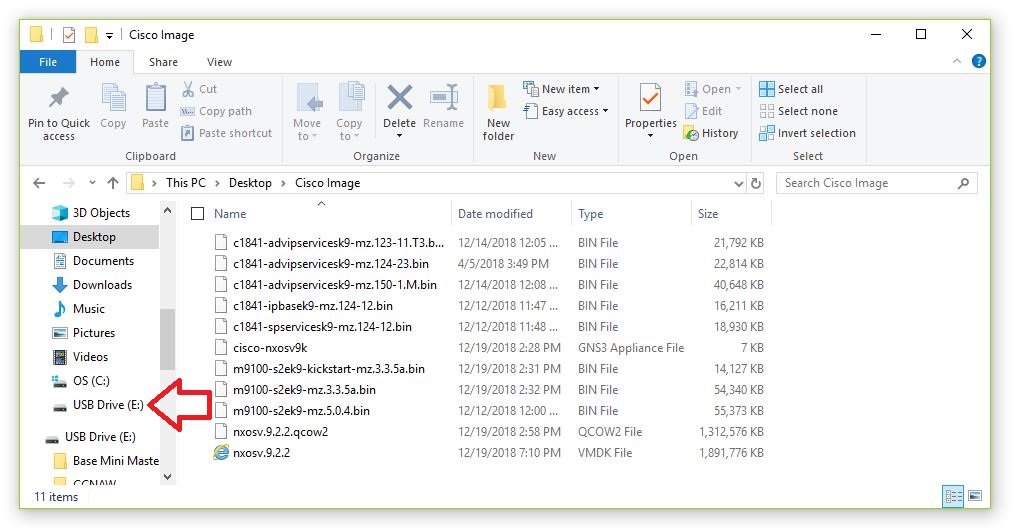
- Transfer the image to the external device
- Pop the card out
- Insert the card back into the 1841
- Powercycle the device
Some networking devices that use flash will make it ejectable like the 1841.
Doing so can offload the work of Level 2 & 3 engineers by enabling Level 1 techs to perform this task. Files can be easily transferred from a user's workstation onto flash, which can then be reinserted.
USB
This second method (USB) requires command line knowledge and this device is formatted with FAT-16, which is not compatible with FAT-32 (default).
Below will walk you through the process of changing the image file.
|
1
|
Issue the following key sequence (Ctrl^a n) to access a different console session. Then execute the following command to view the IOS image file |
Router#dir
|
2
|
Execute the following command to verify the feature-set |
Router#show version
A common meaning for an asterisk is everything. The directory below only contains one file and the easiest way to delete it is to use this character.
|
3
|
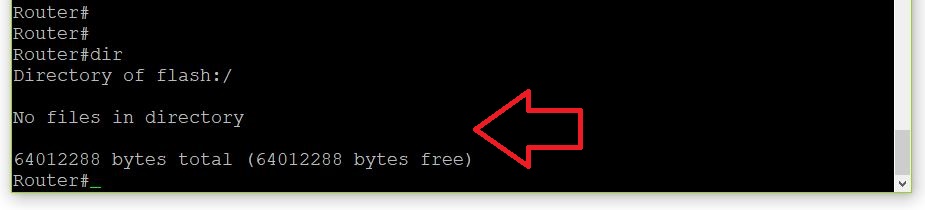
Execute the following command and press the Enter key twice to delete the image file |
Router#delete *

|
4
|
Execute the following command to verify |
Router#dir
|
5
|
Issue the following key sequence (Ctrl^a i) to insert a USB drive |

|
6
|
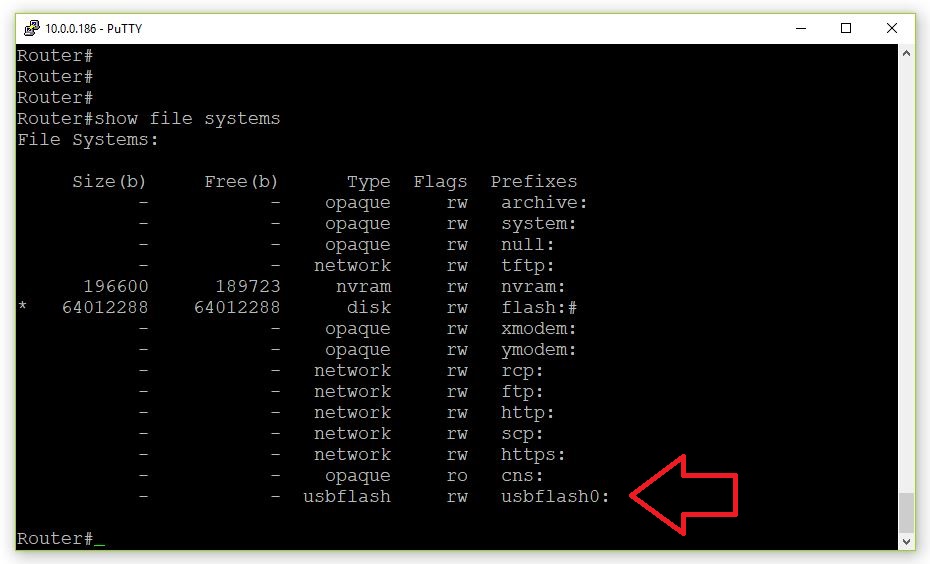
Execute the following command to verify |
Router#show file systems
|
7
|
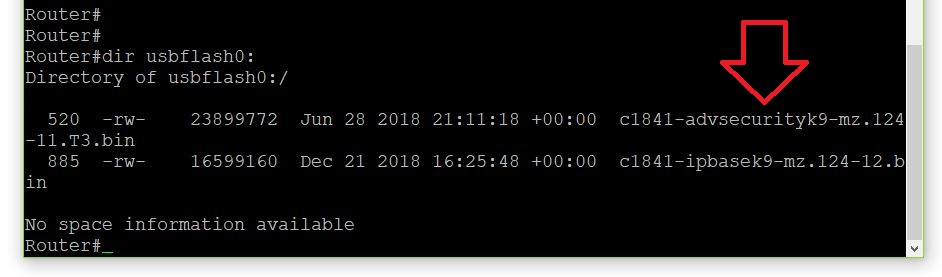
Execute the following command to view the image file stored on the external device |
Router#dir usbflash0:
Dots are used by filesystems to determine position. A single dot means current position, which in this case is flash:/.
|
8
|
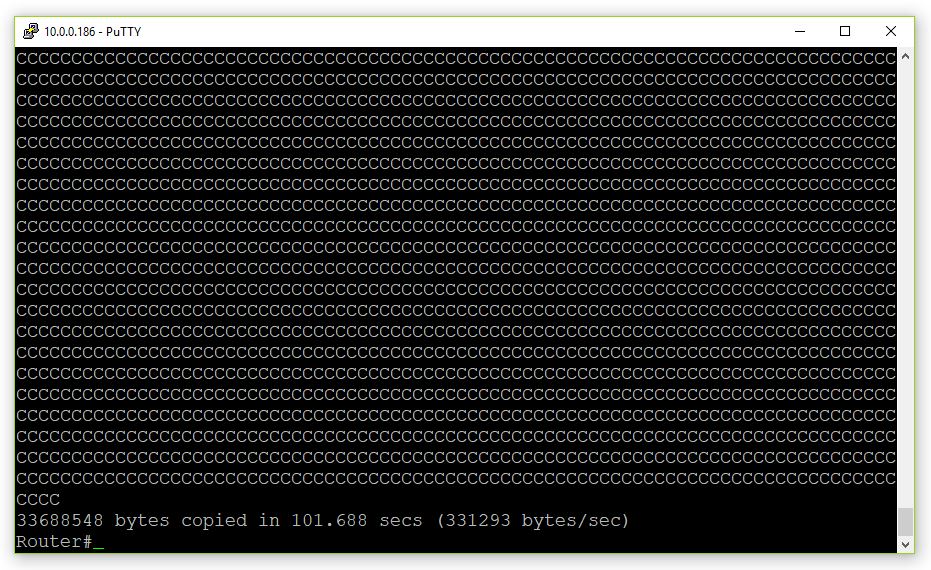
Execute the following command and press Enter to copy this image to flash: |
Router#copy usbflash0:c1841-advsecurityk9-mz.124-11.T3.bin .

Completed copy.
|
9
|
Execute the following command to verify |
Router#dir

The previous feature-set will remain until the system is powercycled.
|
10
|
Execute the following command and press Enter to load the different feature-set |
Router#reload

|
11
|
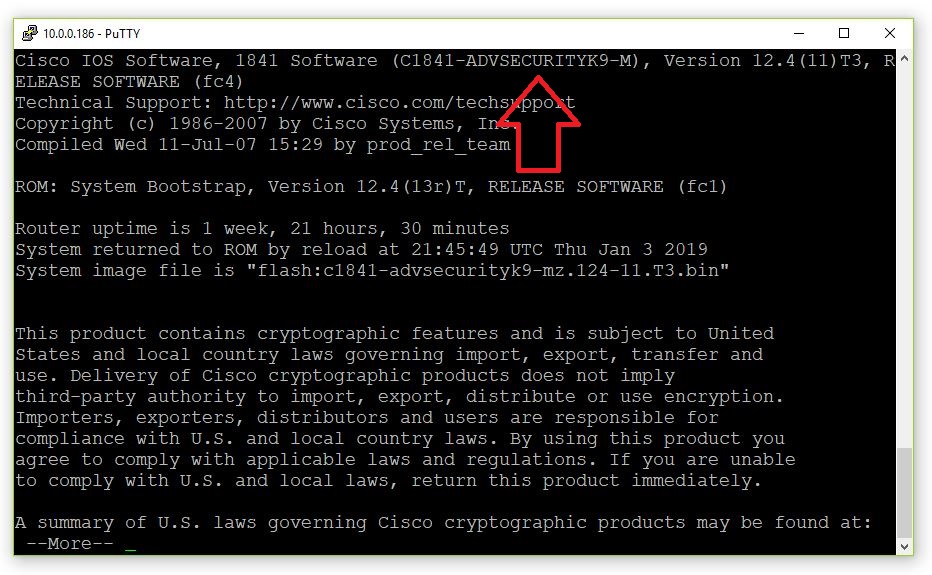
Once the device reboots, execute the following command to verify |
Router#show version
Local backups are used mostly to correct human error. Below will walk through two methods of backing up configuration locally:
- Old Way
- New Way
Old Way
The old way to backup configuration, was to simply copy the contents of the running-config into another file.
|
1
|
Execute the following command and press Enter to create a container used to house backup configuration files |
Router#mkdir BACKUP

|
2
|
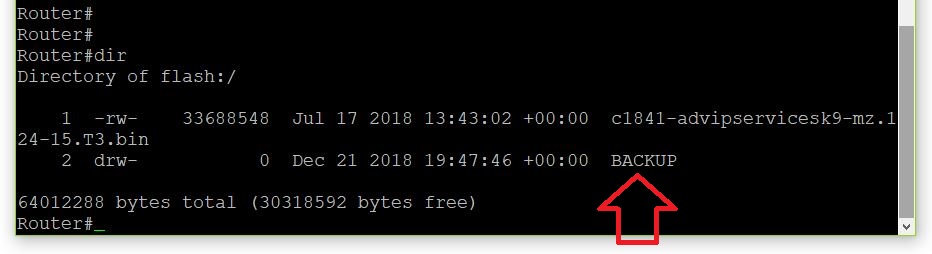
Execute the following command to verify it has been created |
Router#dir
|
3
|
Execute the following command and press Enter to save the configuration |
Router#copy run BACKUP/R-Conf

|
4
|
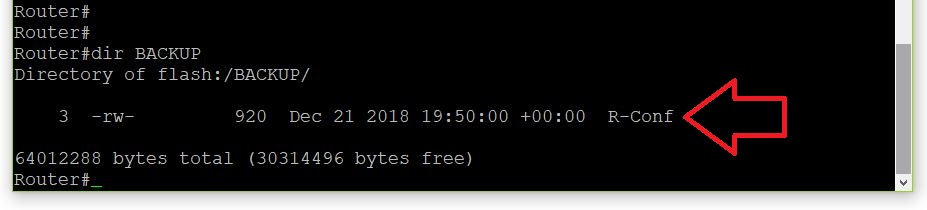
Execute the following command to verify the backup exists |
Router#dir BACKUP
|
5
|
Execute the following command and press the spacebar multiple times until you are returned to a prompt |
Router#more BACKUP/R-Conf
Device hostnames are used for identification and must follow these rules:
- Must start with a letter
- Must end with a letter or number
- Interior can include letters, numbers, and hypens
- Must be less than 63 characters
|
6
|
Execute the following command to make a configuration change |
Router(config)#hostname R1

|
7
|
Execute the following command and press Enter to revert the configuration back to a previous state |
R1(config)#do copy BACKUP/R-Conf run

New Way
One part of human error is forgetting. The archive feature was introduced in release 12.3(4) and provides the capability to automate backups.
|
1
|
Execute the following command to enter archive configuration mode |
Router(config)#archive

|
2
|
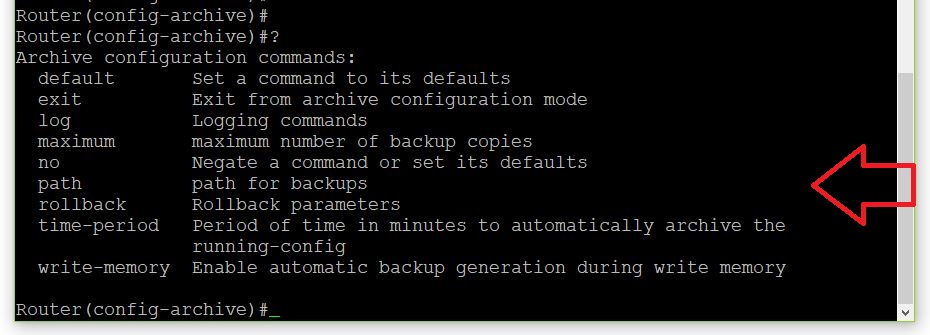
Use Cisco's help to view the configuration options |
Router(config-archive)#?
|
3
|
Execute the following command to define the storage location and filename that includes a timestamp |
Router(config-archive)#path flash:/BACKUP/$t

|
4
|
Execute the following command to create a backup each time a save is issued |
Router(config-archive)#write-memory

|
5
|
Execute the following command to issue a save |
Router(config-archive)#do copy run start

|
6
|
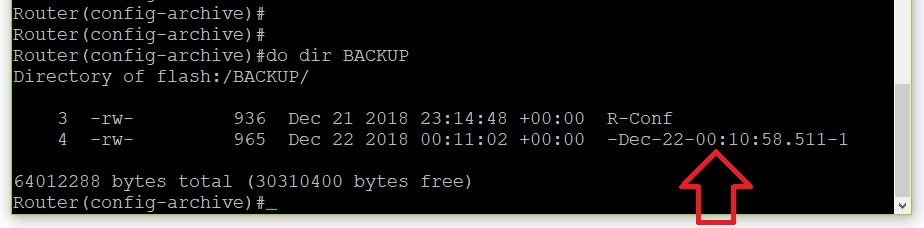
Execute the following command to verify it's working |
Router(config-archive)#do dir BACKUP
Manual backups can also be performed using this feature.
|
7
|
Execute the following command to create a backup without issuing a save |
Router#archive config

|
8
|
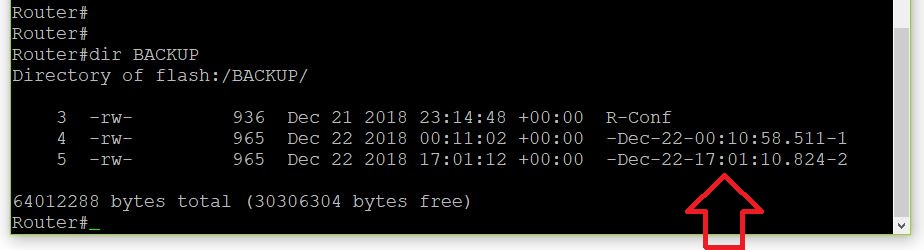
Execute the following command to verify |
Router#dir BACKUP
Knowing how to filter output and document tasks is key when managing devices. This section will demonstrate:
- How to use output modifiers when managing files
- How to add comments to files
Output Modifiers
Output modifiers are commonly used by operating systems to ease administration when working with files. This section will demonstrate some commands that can be used to filter text displayed within the CLI.
|
1
|
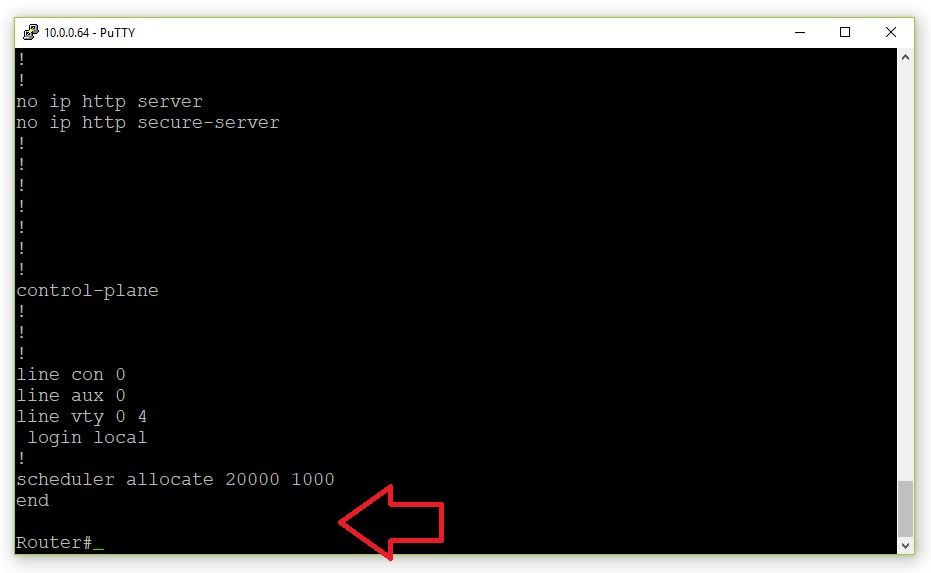
Execute the following command to display the first page of the running-config |
Router#show running-config
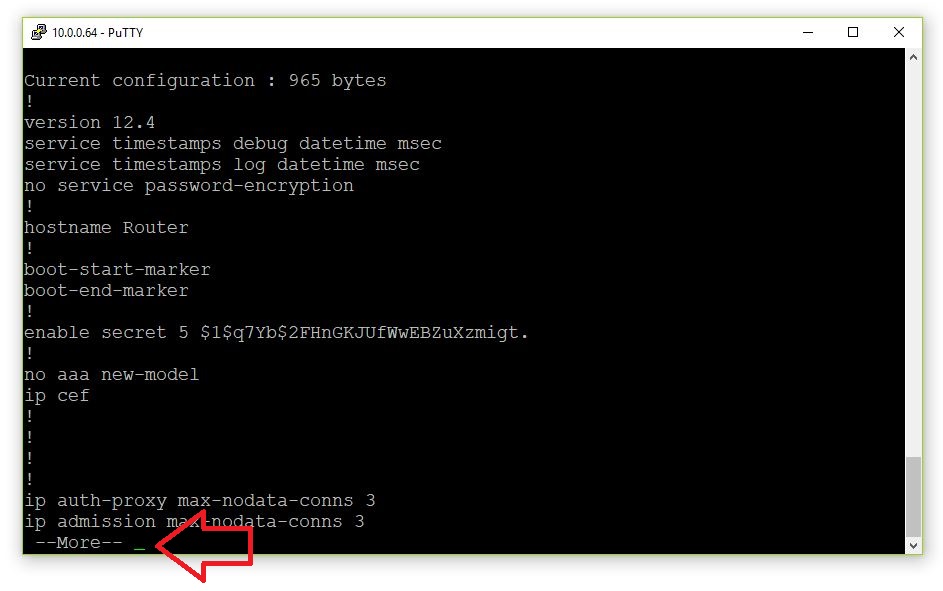
In order to view the whole file, both the Enter key and or the Spacebar must be pressed any number of times.
|
2
|
Execute the following command to view some command arguments that can be used to filter what is displayed |
Router#show running-config ?
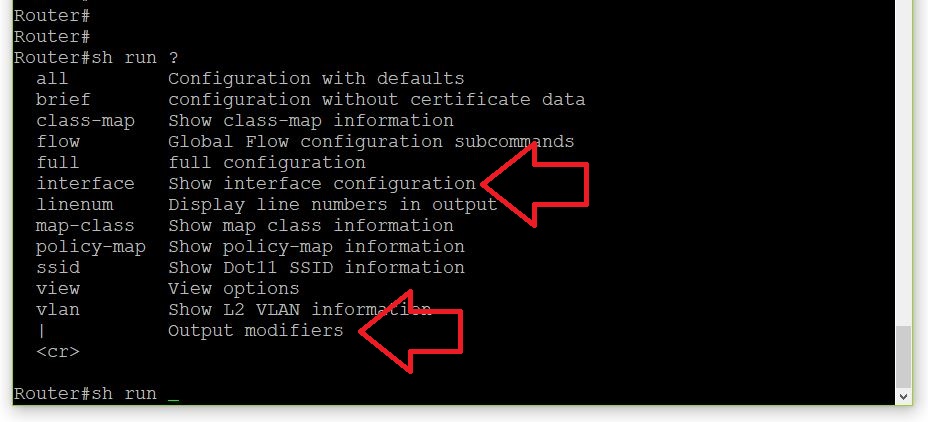
During your CCNA training, interfaces, vty lines, and the console port (con 0) are common devices that will be configured.
|
3
|
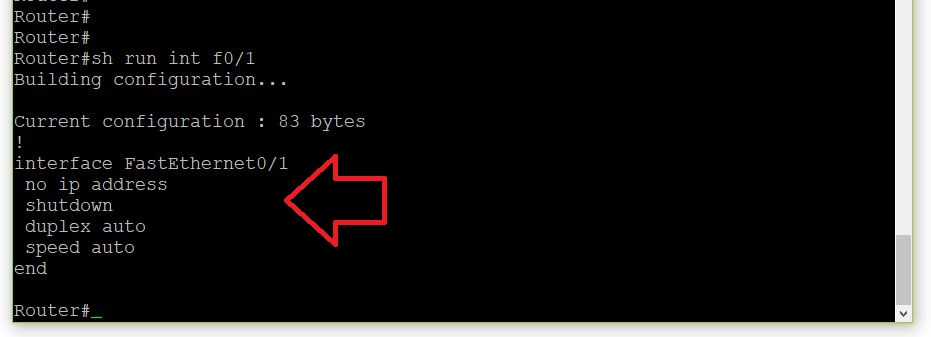
Execute the following command to view the configuration that pertains to FastEthernet0/1 |
Router#show running-config interface FastEthernet0/1
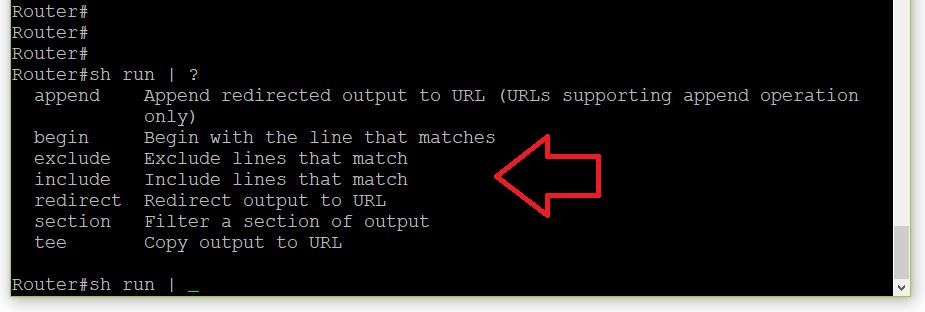
A pipe is commonly used for interprocess communication, where the output of one process is the input to another. A pipe is also commonly used with some sort of output modifier (ex. find, grep, etc.).
|
4
|
Execute the following command to view some output modifiers available with our image |
Router#show running-config | ?
|
5
|
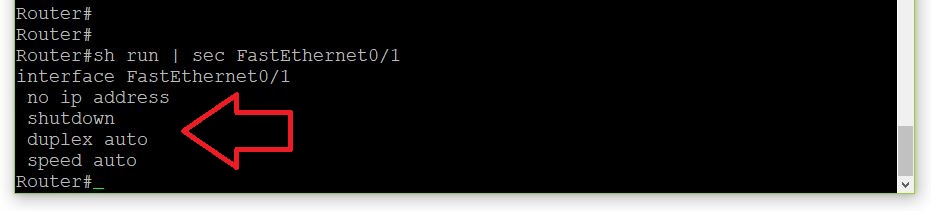
Execute the following command to view only the section of the config file that pertains to FastEthernet0/1 |
Router#show running-config | section FastEthernet0/1
|
6
|
Execute the following command to view all lines from the config file that match the pattern FastEthernet0/ |
Router#show running-config | include FastEthernet0/

|
7
|
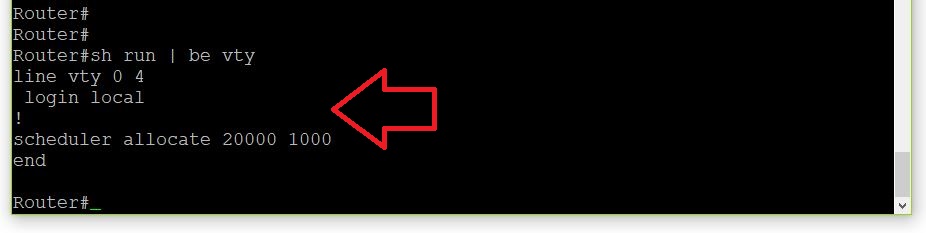
Execute the following command to start viewing the config file once the pattern vty is matched |
Router#show running-config | begin vty
Comments
Documenting tasks is a recommended practice in everything IT. This section will demonstrate how to add commments to config files.
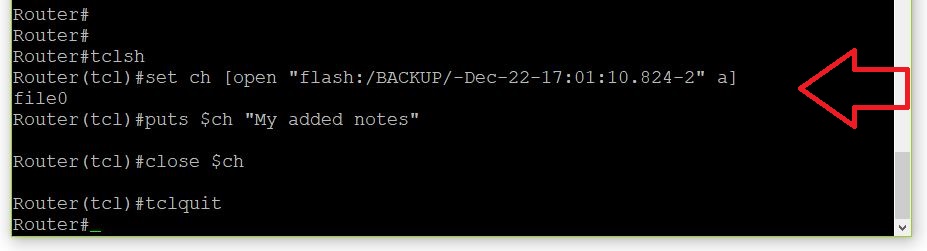
Tool Command Language (TCL) scripts are commonly used to automate tasks. But, here we will access a TCL shell to append a note to a configuration file. Below we are opening a channel to a specified file and adjusting the pointer to the end of the file. After the note is written, the channel is closed.
|
1
|
Execute the following commands to append a note |
Router#tclsh
Router(tclsh)#set ch [open "flash:/BACKUP/-Dec-22-17:01:10.824-2" a]
Router(tclsh)#puts $ch "My added notes"
Router(tclsh)#close $ch
Router(tclsh)#tclquit
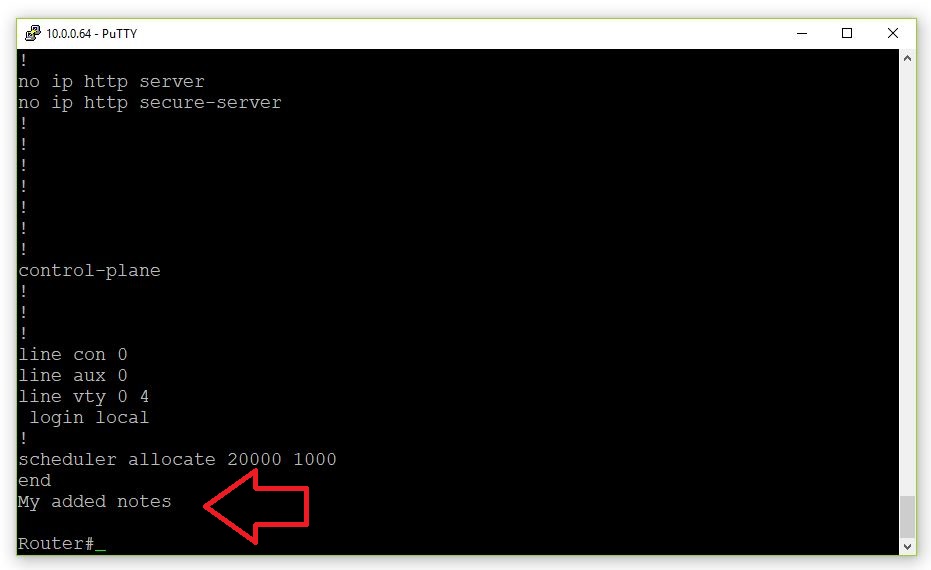
The "end" keyword in the configuration files prevents all preceeding characters from being interpreted as commands.
|
2
|
Execute the following command and press the spacebar multiple times to verify |
Router#more flash:/BACKUP/-Dec-22-17:01:10.824-2
Click the start button to review the questions that pertain to this section.